Binary Clock
| Binary Clock Release status: experimental [box doku] | |
|---|---|
| Description | Clock showing the time in binary or decimal |
| Author(s) | CSchlipp |
| Last Version | 0.0.1 () |
| Platform | AVR |
| Download | none |
About This Project
In this project, we construct a binary watch using the common IKEA Ribba frame, several parts cut by the CNC, an AVR-Board and some digital RGB LEDs.
Detailed Description
The clock should be able to display the time (e.g. 12:38:59) in different styles:
- decimal
H/10 H M/10 M S/10 S 1 2 3 8 5 9 O O X O X X O X X O X X O O X X X O O X X X O X X X X O X X X X X X X X X X X
- BCD (binary coded decimal)
H/10 H M/10 M S/10 S 1 2 3 8 5 9 O O O O O O O O O O O O O O O O O O O X O X O O O X O O X X O O O X O X O X X
- binary
n/a H n/a M n/a S 12 38 59 O O O O O O O O O O X X O O O O X X O O O X X O X O O O O O X O X O O O O O X
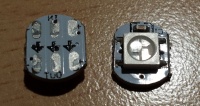
I was able to gather some cheap digital RGB LEDs from aliexpress and wanted to revive my old binary watch.
As before, an IKEA Ribba frame is used as a casing. This documentation is about the large version (50cm x 50cm) but should work wit smaller versions as well.
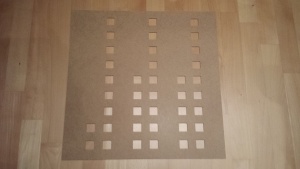
Thanks to some very nice and friendly Laboranten, I was able to cut my dxf-design on the CNC. The result is very good and precise!
To ease things up, the clock will be constructed in a three-layer design: Front - Division - Back
Front:
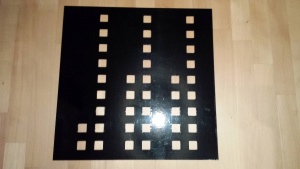
- The holes in the front are sized 26mm x 26mm.
Division:
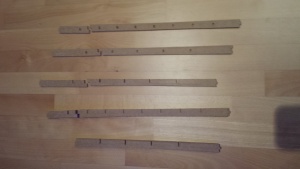
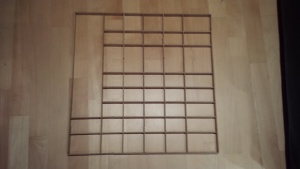
- The mid part is designed as a kit which can quickly assembled to "some boxes", preventing the light of one box to bleed into another. The parts had to be splitted due to some limitations of the CNC.(Note that one seperator is missing in the image above)
The larger box will hold the electronic components later on.
Back:
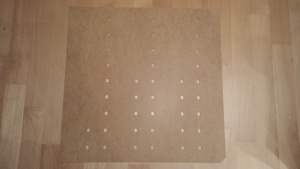
- The holes in the back are designed to fit the small LED pcb's exactly. They are positioned in the center of each cutout on the front.
Current Status
Assemble parts
- The front has been bonded with black adhesive instead of paint.
I've found "PLEXIGLAS® Folie Weiss 99532 GT - 0,5 mm" which seems to fit quite well. I think I'll give it a try...
Timeline
ToDo:
- cut missing seperator (counting is hard sometimes...)
- wire LEDs
- buy diffusor
- prototype with Arduino
- use wordclock pcb
- add animations
Done:
- LEDs arrived
- DXF Design completed
- Ribba frame bought
- Parts cut
- first prototype of pcb delivered
- bought all parts for the pcb
Fieldnotes
- count parts for division (mid part) correctly
- fix parts in cnc properly, otherwise parts may become too small
- fix bonding in the back with tape, smaller parts end to loosen
Ressources
- CNC (CNC-Fraese)
